The short answer
Photograph the candle unlit first. That's the clean, true record of the jar, the label and the wax, and it's the shot buyers will lean on when they're deciding whether the thing in front of them is the thing they want. Then do a lit shot for mood. Two jobs, two sets of photos, and honestly they don't want to be the same picture.
For both, the recipe is pretty much the same: soft side light from a window or a lamp bounced off something, a little white card on the shadow side to fill things in, the label square to the camera so it reads properly, and a few props that hint at the scent. That's it. Everything else in this guide is just detail on those four or five habits, plus the bits that go wrong.
What makes a candle photo work
Here's the odd thing about selling a candle online. Nobody can smell it. Nobody can pick it up, feel the weight of the jar, or lift the lid and have a sniff. The photo has to do all of that work on its own, and it has to do it quietly, without shouting.
So the picture needs to suggest three things: scent, warmth and size. Scent comes from the props and the colours (more on that later). Warmth comes from the light, which is why a soft, slightly golden side light does so much better than a flat, bright, overhead one. Size is the sneaky one. A candle on a plain white background with nothing near it could be a tealight or a huge three-wick monster. A mug, a book, a hand, anything of a known size nearby settles it without you having to say a word.
Then there's the label, and I mean this one is non-negotiable. The brand name, the scent name and the small print (weight, burn time, that sort of thing) all need to be readable. Burn time and weight are the sort of detail a buyer looks for, and if they can't read it they're left guessing.
Colour has to be true too. The glass colour and the wax colour are part of what the buyer is paying for, and if your cream wax comes out yellow because of a warm bulb, or your amber glass comes out brown and murky, you're setting up a small disappointment for when the parcel arrives.
If you want the wider lighting basics before you get stuck into candles specifically, the product photography lighting guide covers the general setup, and the product photography ideas guide is good for scene thinking. If a phone is your camera, there's a separate guide on product photos with an iPhone.
Flame, glow and exposure
Right, the flame. This is where most people get tripped up, so let's slow down a bit.
A lit flame is far, far brighter than the jar, and far brighter than the room around it. Your camera sees that and has to decide what to do. If you tell it (or let it decide) to expose for the flame, then everything else goes dark: the jar, the label, the wax, the table. You get a lovely tiny flame and a black blob where a product used to be. Not useful.
So do the opposite. Expose for the jar and the label, and let the flame be bright. It's allowed to be the brightest thing in the picture; that's rather the point. What you must not do is let it clip into a flat white blob with no shape to it. A good flame has a bit of colour in it, a yellow centre and a soft edge, maybe a hint of orange. If it's gone to pure white you've overexposed it, and you'll want to bring the exposure down a touch or move the light.
A few things help the flame behave:
Keep it small and steady. No draught at all, so shut the window, switch off the fan, and don't breathe on it. A jumpy flame blurs and flickers from frame to frame, and a big flame throws too much light. Trim the wick before you light it, short and neat, and the flame will sit nicely and not flare.
For an evening look, keep your other lights lower than the candle's own glow. If the room lamps are brighter than the candle, the candle just looks like a decoration on a lit table; if the room is dimmer, the candle glows and the whole shot feels warm and quiet. That's the look people are after with a lit shot, really.
Dim room light with a lit candle gives a gorgeous warm glow, but it does mean the camera is working with less light, and that means a steady camera. A tripod, a stack of books, a phone propped against something solid; whatever you've got that doesn't wobble. Handheld in dim light tends to give you a soft, smeary mess, and the label is the first thing to suffer.
I'm deliberately not giving you shutter speeds or ISO numbers here, because the right settings depend entirely on your camera, your room and how dim it is. Use the principle instead: expose for the jar, let the flame shine, and check the screen zoomed in.
And take both versions, unlit and lit, every time. The unlit one is your honest product record; the lit one is the mood. You'll use them in different places, and having both saves a reshoot.
One more thing, and I'm saying it plainly because it matters: never leave a lit candle unattended. Not for a quick cuppa, not to answer the door. Stay with it, keep paper and fabric and dried props well clear of the flame, and blow it out when you've got the shot.
Amber glass, labels and wax
Amber glass is gorgeous and awkward in roughly equal measure. Against a dark background it turns dark and muddy; it just disappears into the gloom and looks like a brown lump. Against a light background, or with light coming through it, it glows, properly glows, like honey held up to a window. So give it light to work with.
The trick is to light the glass from the side or from behind, so the colour lights up from within, while the label is lit from the front so it stays readable. Those are two different jobs, and they can happen with the same soft light if you place things sensibly: a window to one side, the candle angled so that light passes through the glass edge while still falling across the label. A bit of fiddling is normal. Move the candle a few centimetres, look again, move it back. You'll see it change.
Watch for reflections. Glass and glossy labels love to reflect whatever's bright, and the usual culprit is a window, which turns up as a big pale rectangle right across the label and kills the small print. Shift the angle slightly, or move the light, or hold a bit of card to block the reflection. Check the label specifically each time, because you can miss it when you're looking at the whole jar.
Wipe fingerprints off the glass before you shoot. Every single one. They look invisible in real life and then jump out in the photo like they've been lit by a spotlight. A clean microfibre cloth does the job, and you'll want it nearby throughout, because you'll handle the jar again and again as you reposition it.
The label itself should be flat and square to the camera. If it's tilted or curving away, the small print gets squashed and hard to read, and things like the weight and burn time (the stuff buyers hunt for) turn to mush. Turn the jar until the label faces the lens straight on, and get the camera at the same height as the label so you're not shooting up or down at it.
Then look at the wax. Really look. A smooth top is what you want, with no sink holes, no frosting (that pale, crystalline bloom that can appear on some soy waxes), and a centred wick. A buyer who sees frosting or sink holes in a photo may read them as a defect, so look at the top of the wax before you shoot and choose the best-looking candle.
If the candle has a brushed metal lid, it shows its brushing as broad, soft highlights, long pale streaks that follow the grain. That's good, that's what makes it look like metal. What you want to avoid are hard, small bright spots, which come from a small, harsh light source and make the lid look cheap or scratched. A larger, softer light fixes it. And photograph the lid beside the jar as well, as its own shot, so buyers can see the whole thing: the lid on, the lid off, how it sits. It's a small detail that makes the listing feel more honest.
Cosy scenes and scent cues
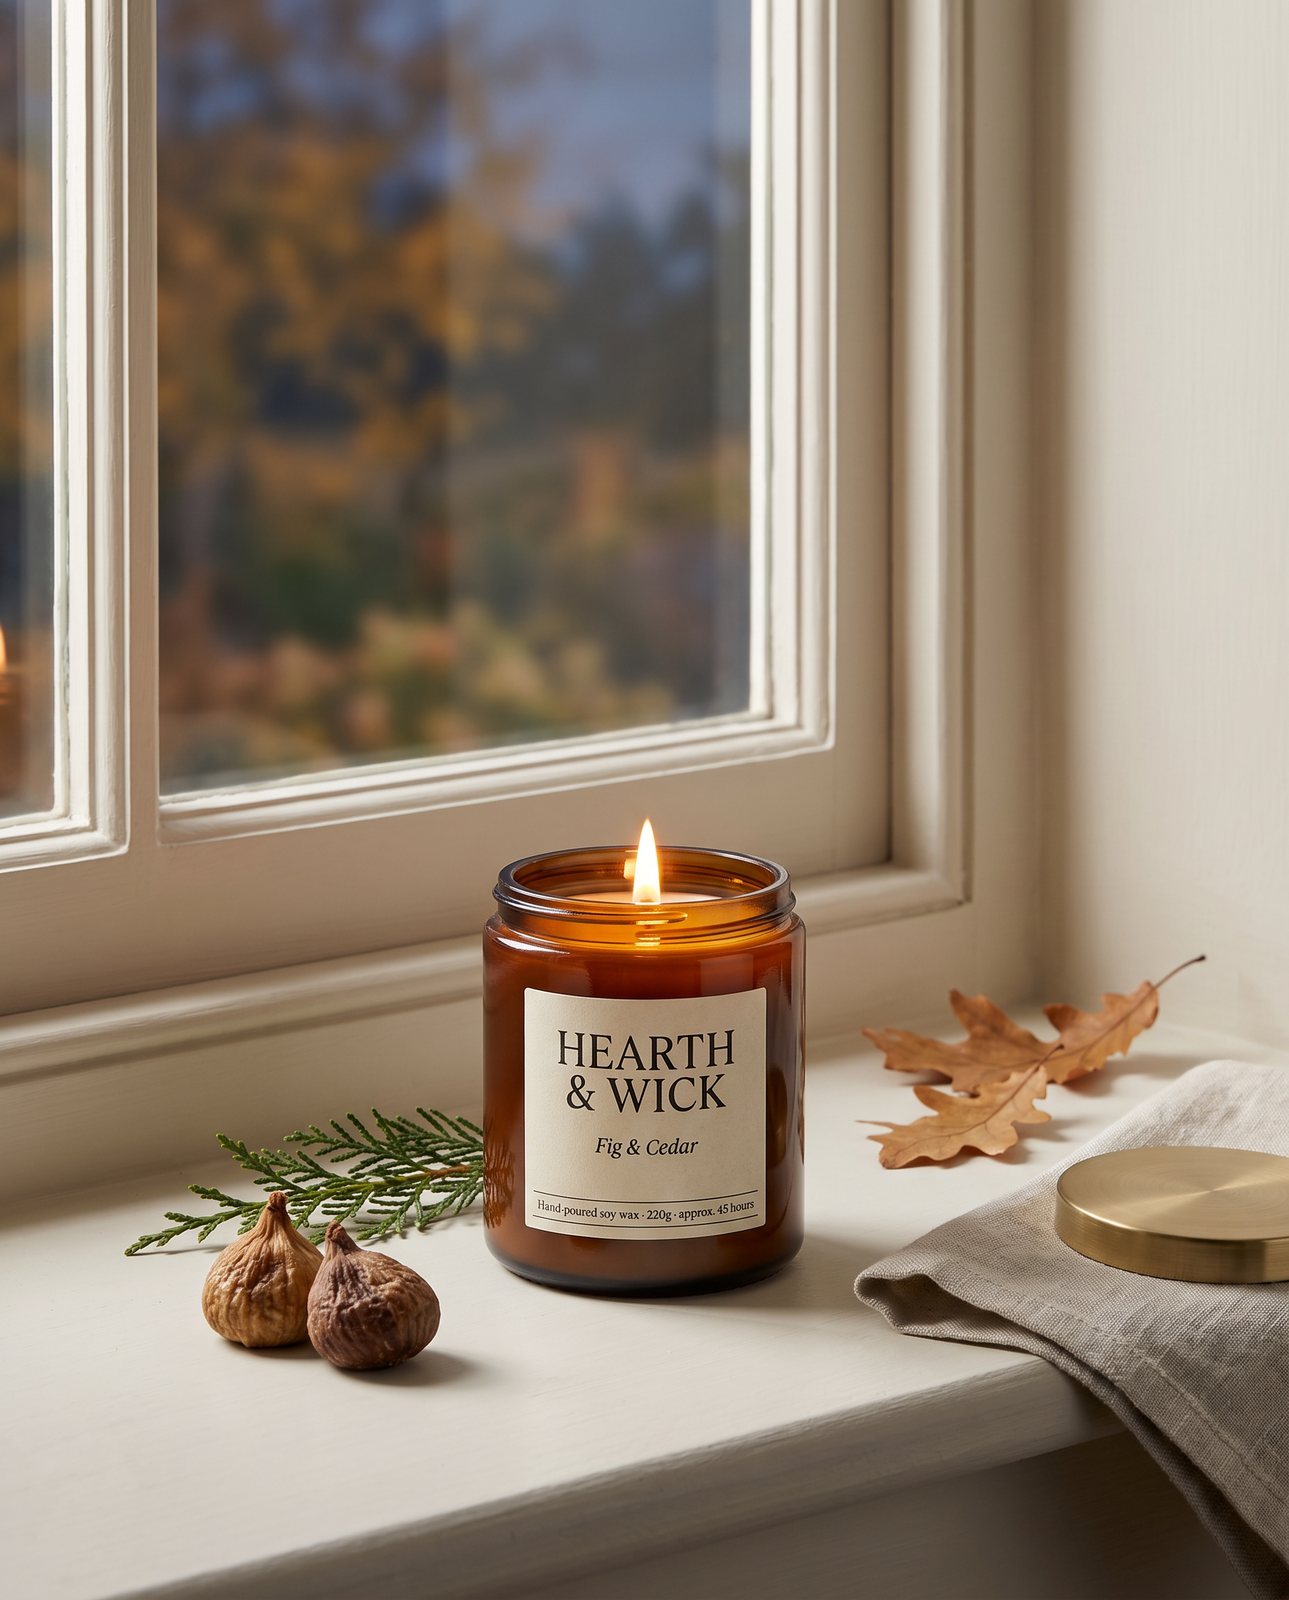
Props are how you smell a photo. It sounds daft, but it works. A fig and cedar candle with a few dried figs and a sprig of cedar next to it tells the buyer exactly what it's going to smell like before they've read a word. For a bathroom candle, linen towels, a bar of soap and a bit of eucalyptus do the same job. For an autumn one, a few leaves and a knitted throw, with a mug sitting on a coffee table. You're building a feeling, and the feeling carries the scent.
A few rules keep it from going wrong. Keep props smaller than the jar, so the candle stays the hero and the figs don't steal the show. Keep them in a matching warm palette; creams, ambers, soft browns, muted greens. If you've got one bright blue thing in there, the eye goes straight to it and the candle loses. And keep it simple. Two or three props is plenty. A crowded scene looks messy and makes the label harder to find.
For a daytime shot, a window with soft light is lovely. Not direct sun, which is harsh and throws hard shadows, but the gentle, diffused light you get on a bright overcast day or from a window with a thin curtain. It makes the wax look creamy and the glass look warm, and it needs almost no extra kit.
If you're after scene ideas for the candle, there are three that suit this sort of jar well, and they happen to be the ones we use in our demo: a cosy evening coffee table, a bathroom shelf with linen towels, and an autumn windowsill. Three very different moods from the same candle, which is rather the point. If you're thinking about how scenes like these sit in a listing, our guide to lifestyle product photos goes into it.
You can build scenes like these yourself with some patience and props from around the house, though the setting up and clearing away takes time.
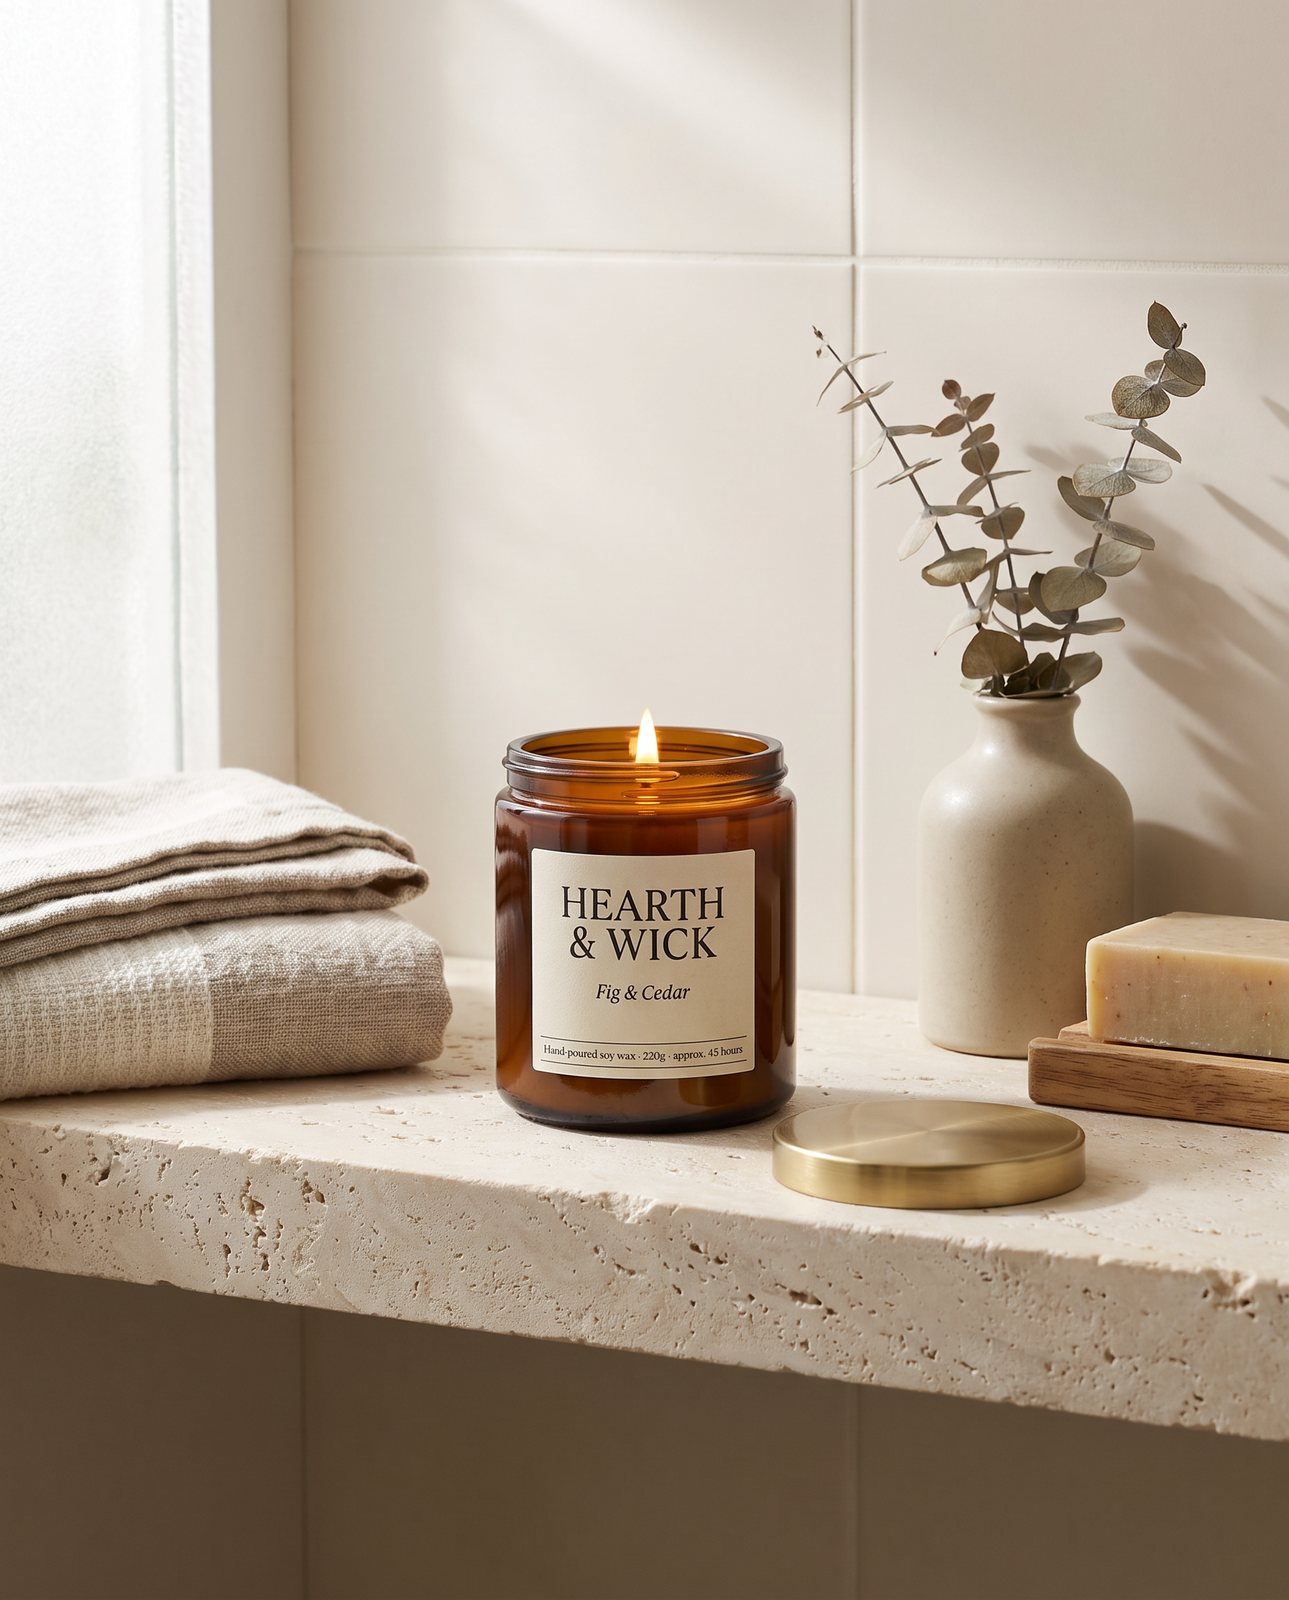
A second scene for the same candle. The flame is lit, the label is square to the camera and the props hint at the scent.
How Product Photo Shots helps (and what it doesn't do)
A straight account of what we do and don't do.
We start from your one photo of the candle and put it in new scenes. That's the whole idea: you've got a decent photo of the product, you want it somewhere that looks like a coffee table, a bathroom shelf or a windowsill, and we make those scenes around it. Every shot is reimagined with AI and labelled as such, and the files carry standard AI-provenance metadata, so nobody's being fooled about what they are.
Before you pay anything, we study your photo and list what must stay the same: the shape, colour and text of the product. That check is free and takes about a minute (we measured the precheck at 11 seconds on 2026-10-01, so it's usually quicker than the minute). And once a shot is made, we check it against that list. A shot that changes the product is remade with a specific fix, up to three attempts in all. If it's still wrong after that, a person looks at it, and it's never delivered as is. You also get one free redo per delivered shot, in case something's off that we both missed.
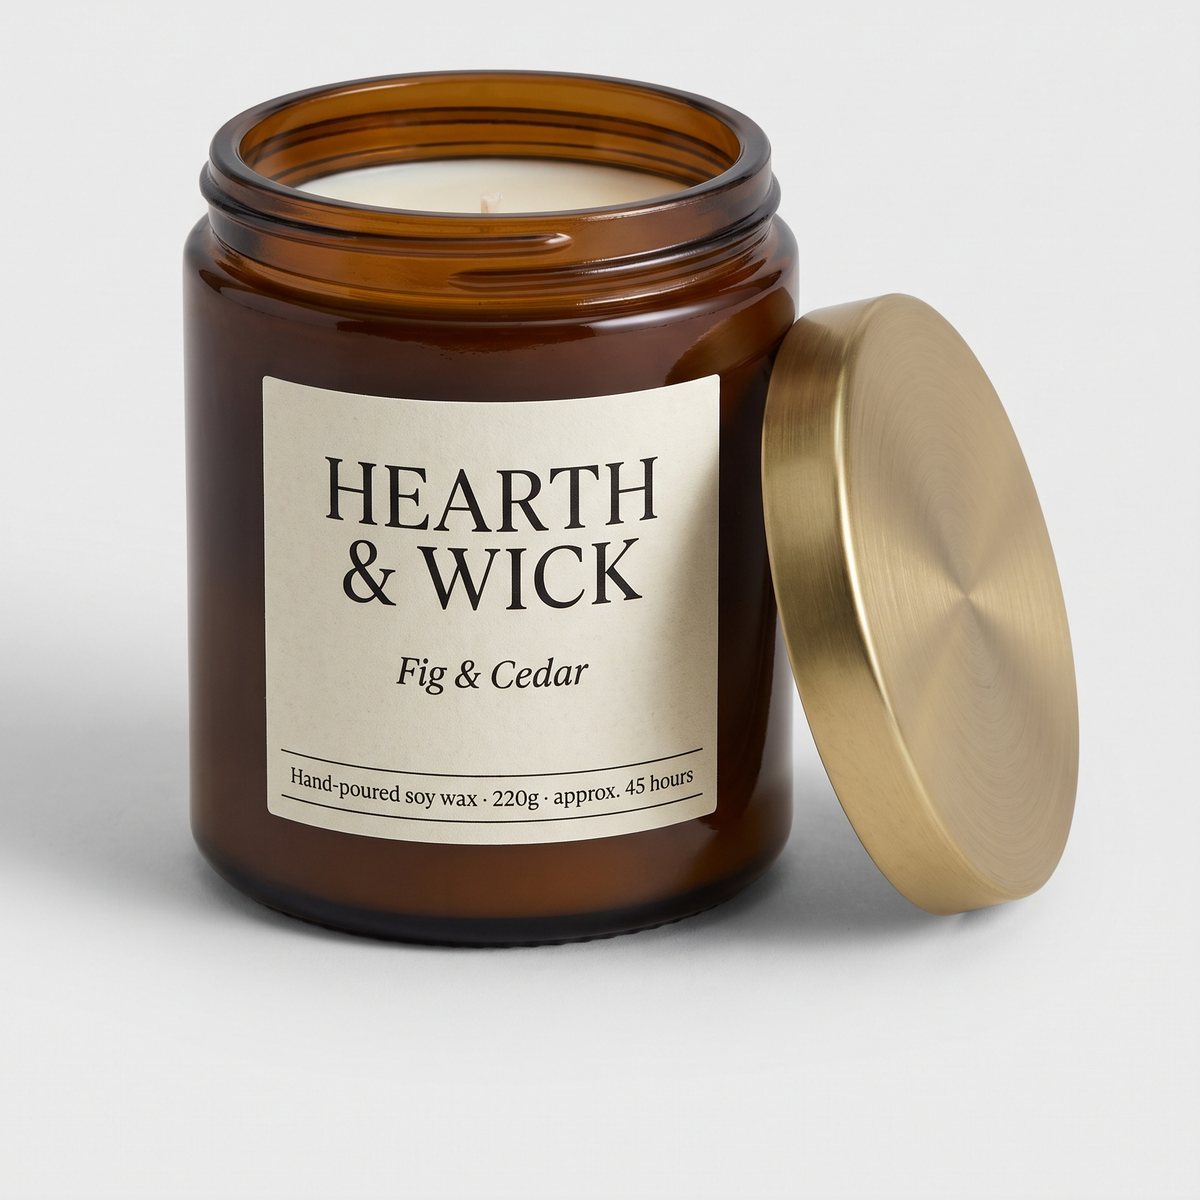
Here's what happened in our own demo run on 19 October 2026. The demo candle was a scented candle in an amber glass jar with a brushed brass lid and a cream printed label reading HEARTH & WICK, Fig & Cedar, and small print. We made three shots across three scenes, and two were delivered first time, meaning the first attempt passed the check.
One first attempt was rejected. The brass lid had come out with ridges that a smooth lid simply does not have, so the check caught it and it was remade. That's the system doing its job.
That isn't the whole story. Separately, in one delivered shot the small print lost the hyphen in "Hand-poured", and our check missed it. We didn't use that shot on this site. So small printed text can still slip, and that's a real limit, not a footnote. In a separate test using a famous brand's product, small printed text on the product (a tongue label, in that case) came out garbled on most shots, while logos and large text held up. So the advice is simple: look closely at the label in every shot before you publish, zoom right in, read the small print word by word, and use the free redo if something's off.
We don't add text or logos to a label, either. What's on your candle is what's on your candle; we don't write over it or invent anything.
And a practical limit on what we can shoot: it has to be a product you own or sell. Well-known brands' candles can't be shot, because the image services refuse them, and we tell customers that before they pay, so nobody's caught out.
On pricing, the packs are 3 shots for £19 (£6.33 a shot), 5 shots for £29 (£5.80 a shot) and 10 shots for £49 (£4.90 a shot). A custom order of 11 to 40 shots is £4.50 a shot. Prices include VAT.